
Reed Making 101
Reed Making 101
The Basics - Gouged to Blank
Introduction
This guide is down to basics. Not my measurements, not giving away my tricks or secrets; just basics that I use when teaching my students and colleagues.
Reed making should be fun and eventful. Reed making is an art that is about experimenting and discovering something new (to you).
Reeds are not a one size fits all, magic bean. Reeds are different for different people, hence why there are so many different methods, different tools, different machines, etc.
Starting with the basics, and going back to basics, is essential for growth and understanding of the bassoon; in both practice and performance.
If you have any questions about anything in this guide, feel free to contact me!
Enjoy,
Daniel

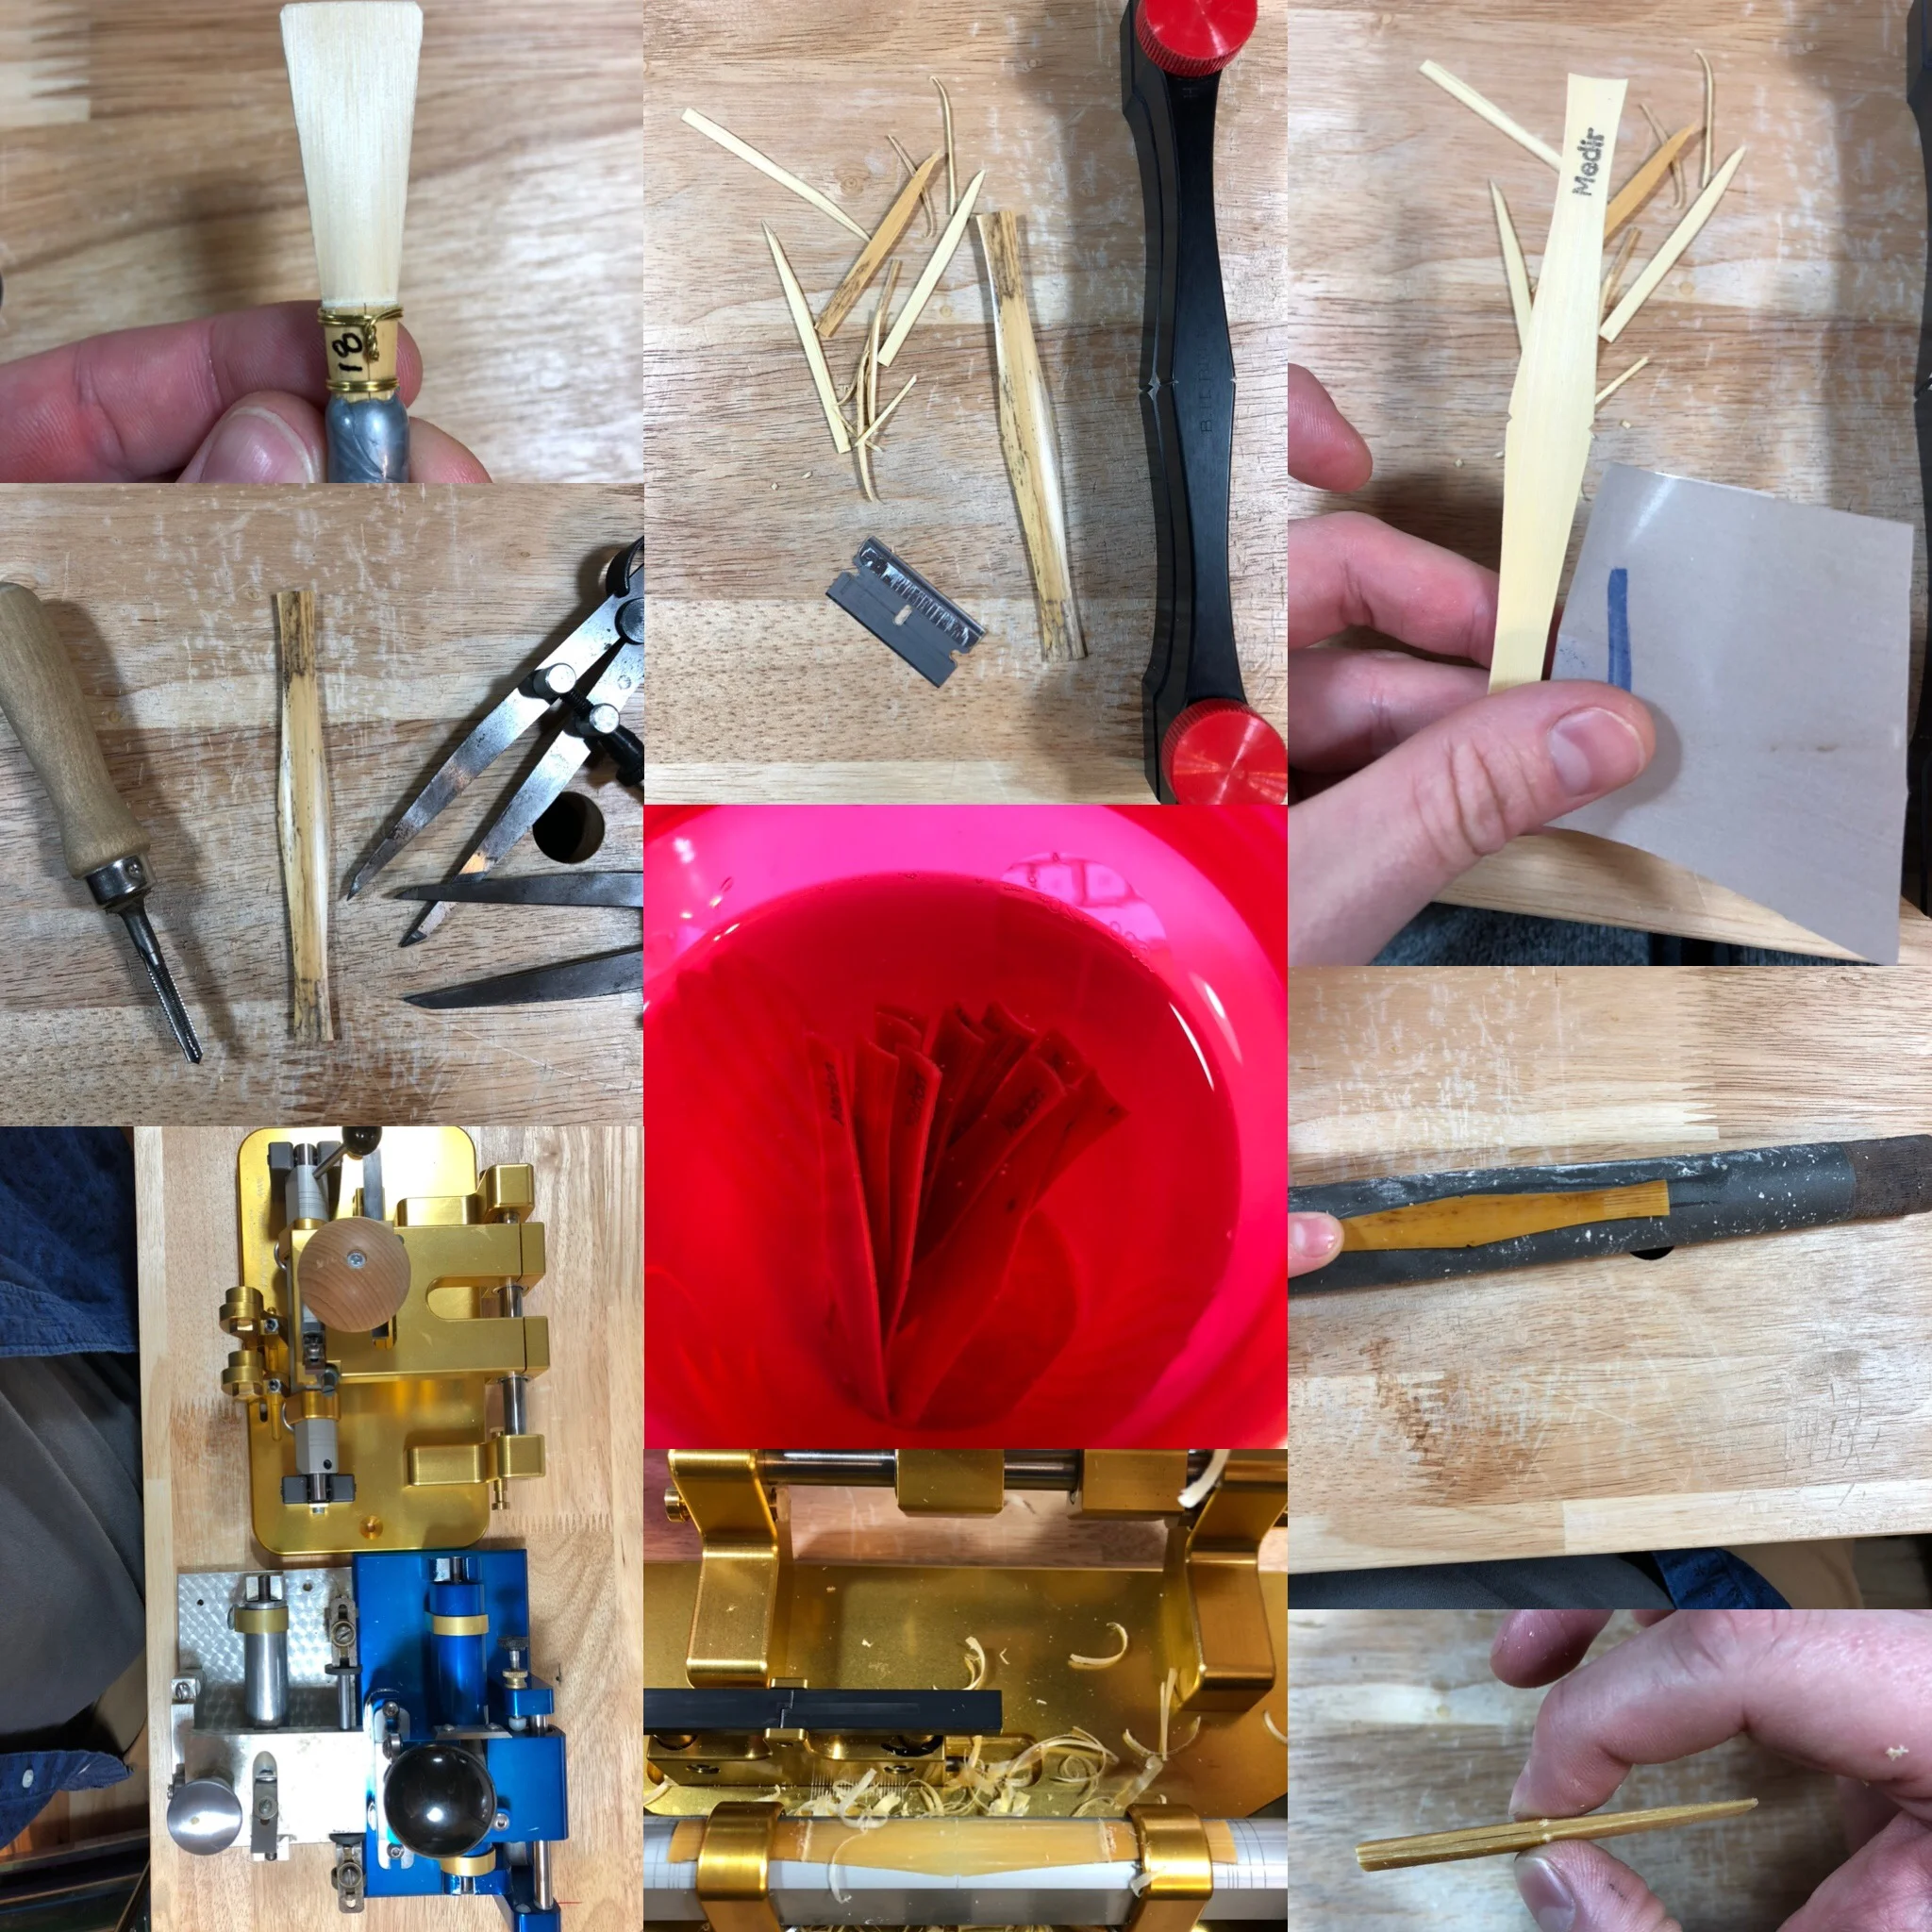
Sort your Cane
Whether you buy it gouged, profiled, gouged and profiled, GSP, etc., sort your cane by year, supplier, grower, processor, etc. This is all very important information for your reed journal. Consistency is what we all strive for, so why not start at the very beginning, at least as far as we can go as the reed makers.
I get mine pre sorted by hardness and density, so I don’t need to organize that far in depth. I only organize by Brand and Supplier. I also get mine at a custom gouge, so I am aware of the tendencies from the supplier, and know from which supplier to make which reeds (concentric/eccentric).
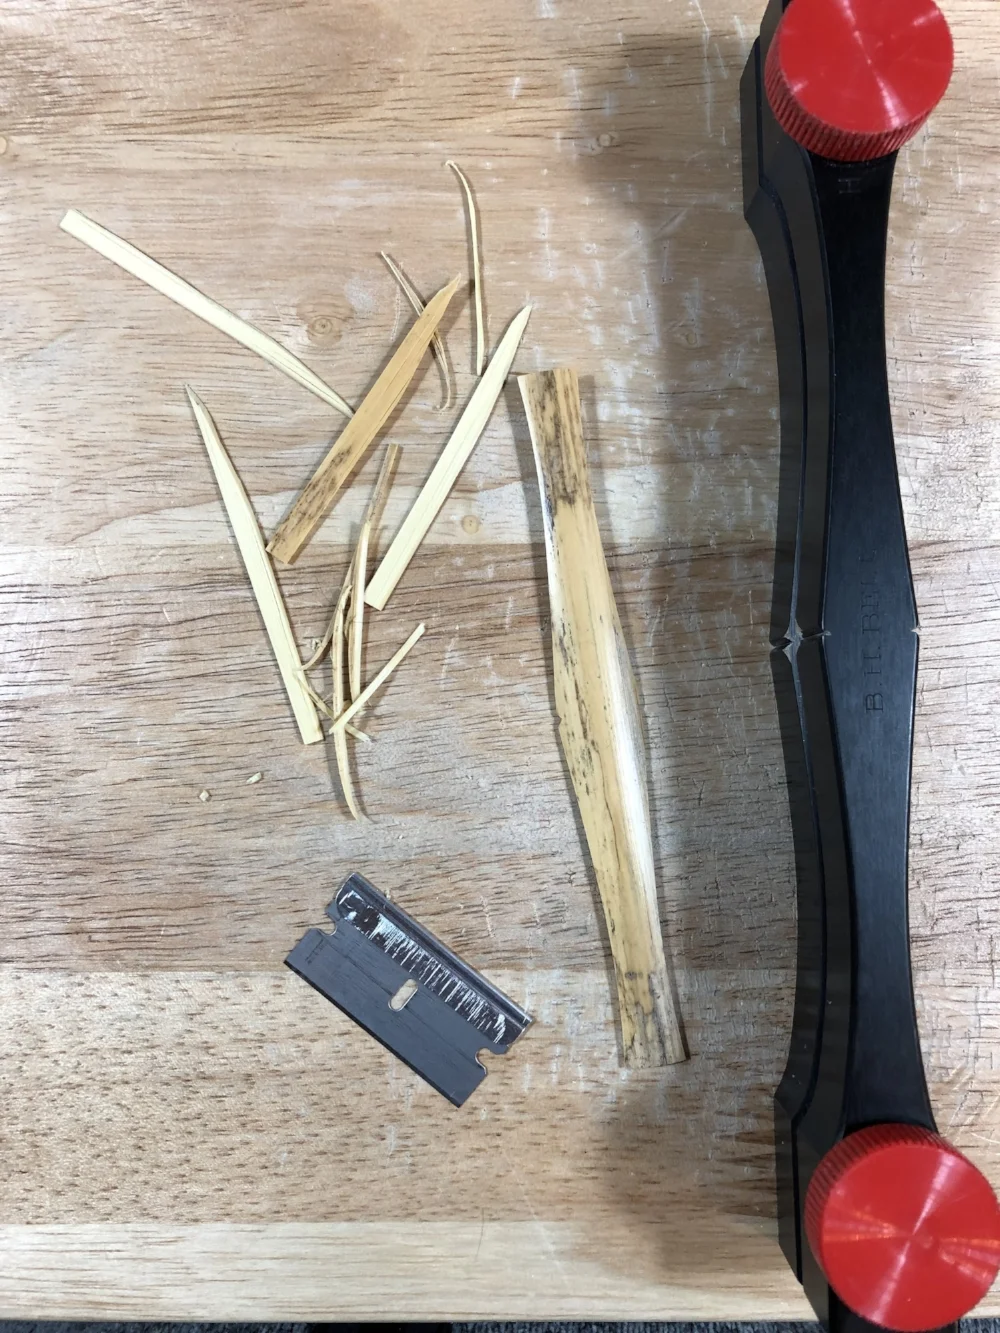
Shape sorted cane
with razor blade, or other preferred blade. I prefer shaping dry most of the time, unless I am wanting a narrower shape than normal.
Shaping is VERY important! Take your time, any misshapen cane will hinder the end result of your reed.

Sand shaped cane
sand the flat edges of your shaped cane it ensure a smooth, consistent surface. I sand using silicone sanding paper in microns. This can be obtained from Amazon, Ebay, or car repair stores. I use a VERY fine grit, as I am only smoothing the cane, not changing the shape.

Score shaped cane
Score in wire marks. I prefer to only mark my first and second wire. Scoring helps prevent cracking, and helps with consistency among batches of reeds. There are many methods to doing this. You may use a triangle file, a compass as I do, a razor blade, or a combination.
This is also when I will bevel if my reed shape requires a pre-form bevel. I am for a 30-45 degree angle in my pre-forming bevel. I have a tool that Jim Poe made me, and I have replicated, to help with this.
I then score my cane with a tap/die tool that I made myself. I score from the 2nd wire down for most reed shapes. Shapes with an extremely round throat, I score from the first wire down.
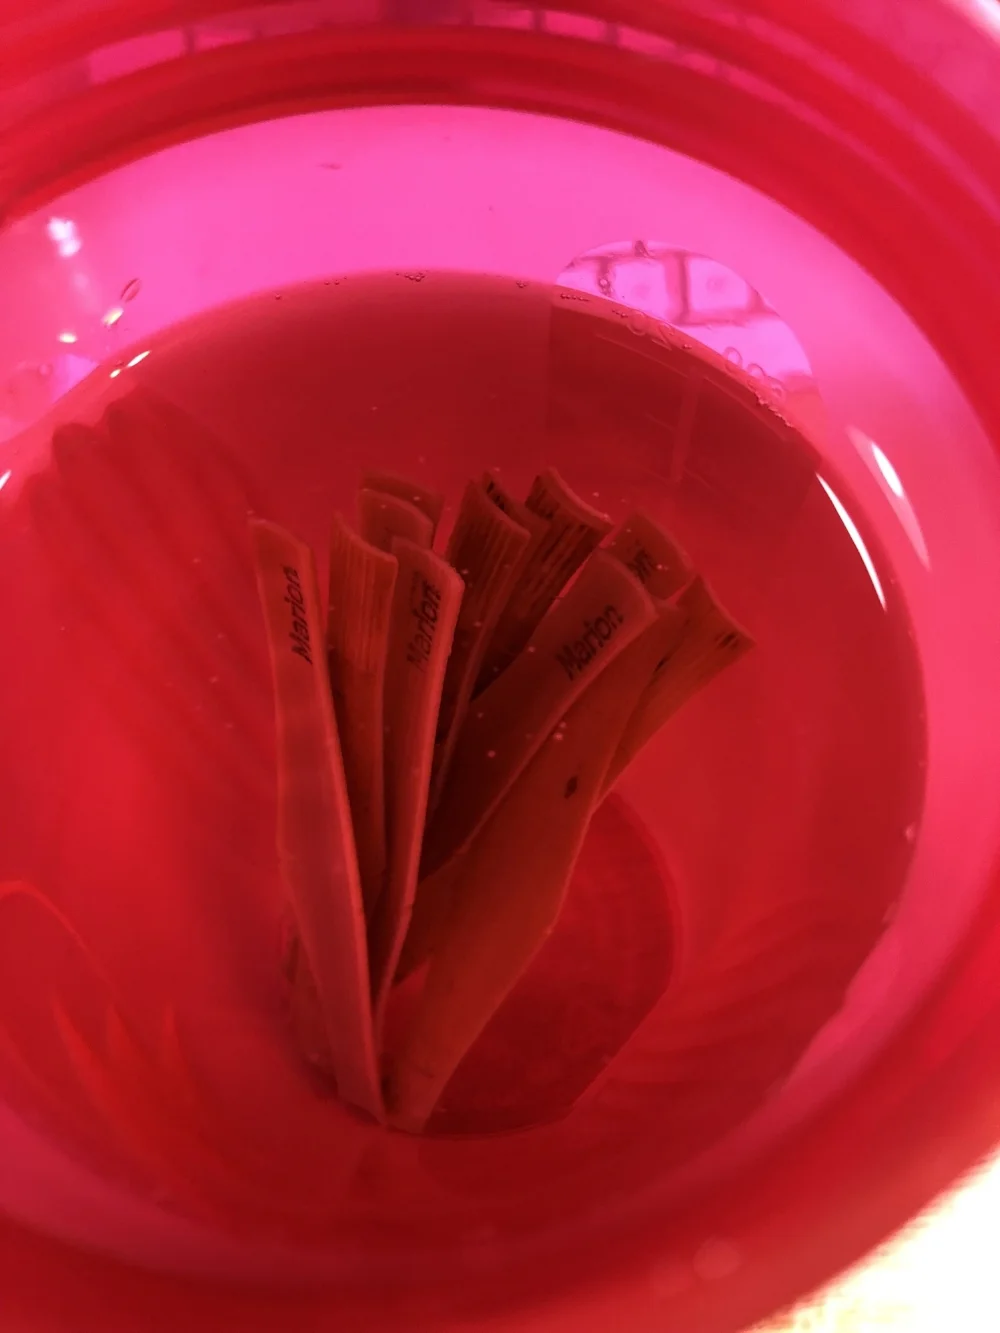
Soak prepared cane
Everyone has their own method to soaking cane. I like to soak mine for 1-2 weeks in a sealed container where I change the water 1-3 times a day. I like when the water runs clear and the water no longer smells like dirty reed water. This is usually around the 8 or 9 day mark.
The day I plan to profile I soak in hot tap water until the water has come to room temperature.

Sanding the prepped cane
After soaking the cane, right before profiling, I sand the inner gouge of the cane to ensure it is smooth and interruption free. I do this with a 25mm diameter dowel/easel with p500 sandpaper. I then rinse the cane to make sure profiling is smooth and uninterrupted.

Profilers
Whatever you use, make sure the blades are sharp, the barrel fits correctly, and the machine is calibrated to the specifications/measurements of you and/or your teacher.

Profiling
…a very misunderstood and overlooked part of reed making.
I do this step wet. The cane must be centered on the barrel according to the manufacturers’ markings (center line, tube line, length line, etc). But, refer to your shape markings as well. The indents in straight shapers are VERY IMPORTANT for profiling evenly.
Make sure you rotate the barrel every 5-10 strokes. This makes sure the profile is even and the blade isn’t ripping up cane.

Scoring bars
If your machine has scoring bars, MAKE SURE THEY ARE SET UP CORRECTLY FOR YOUR GOUGE. Too deep, and you will have leakage around the first wire, too shallow, and you will have cracking around the collar.
Make sure, when setup correctly, you score the collar at every rotation to encourage a strong collar (if desired). Otherwise, score only once at the start to prevent cracking.

Starting a Mummy!
Fold the profiled cane over the center point. For me, this is scored between the notches in the shaped cane. This provides a perfectly even fold every time (as pictured). Make sure the rails of the blade are lined up, not overlapping, and hold in place while applying the wire.

First wire
While holding the cane in place with one hand, develop a technique to apply the first wire around the first score mark.
When tightening, do NOT tighten fully, you want to continue seeing the straight edge on the rails (no overlap, but no space between the blades as well). This will provide enough space for the tube to become round.
A lot of people will see cracking around the collar because the first wire is either too tight or too loose. Usually it is because it too tight and the cane has nowhere to go.

MAKE A MUMMY!
Yet another crucial step. How tightly do we wrap the thread to form the reed?!
Firstly, what type of thread/string should we use? Something that isn’t lacquered like cotton, silk, crochet thread, or yarn.
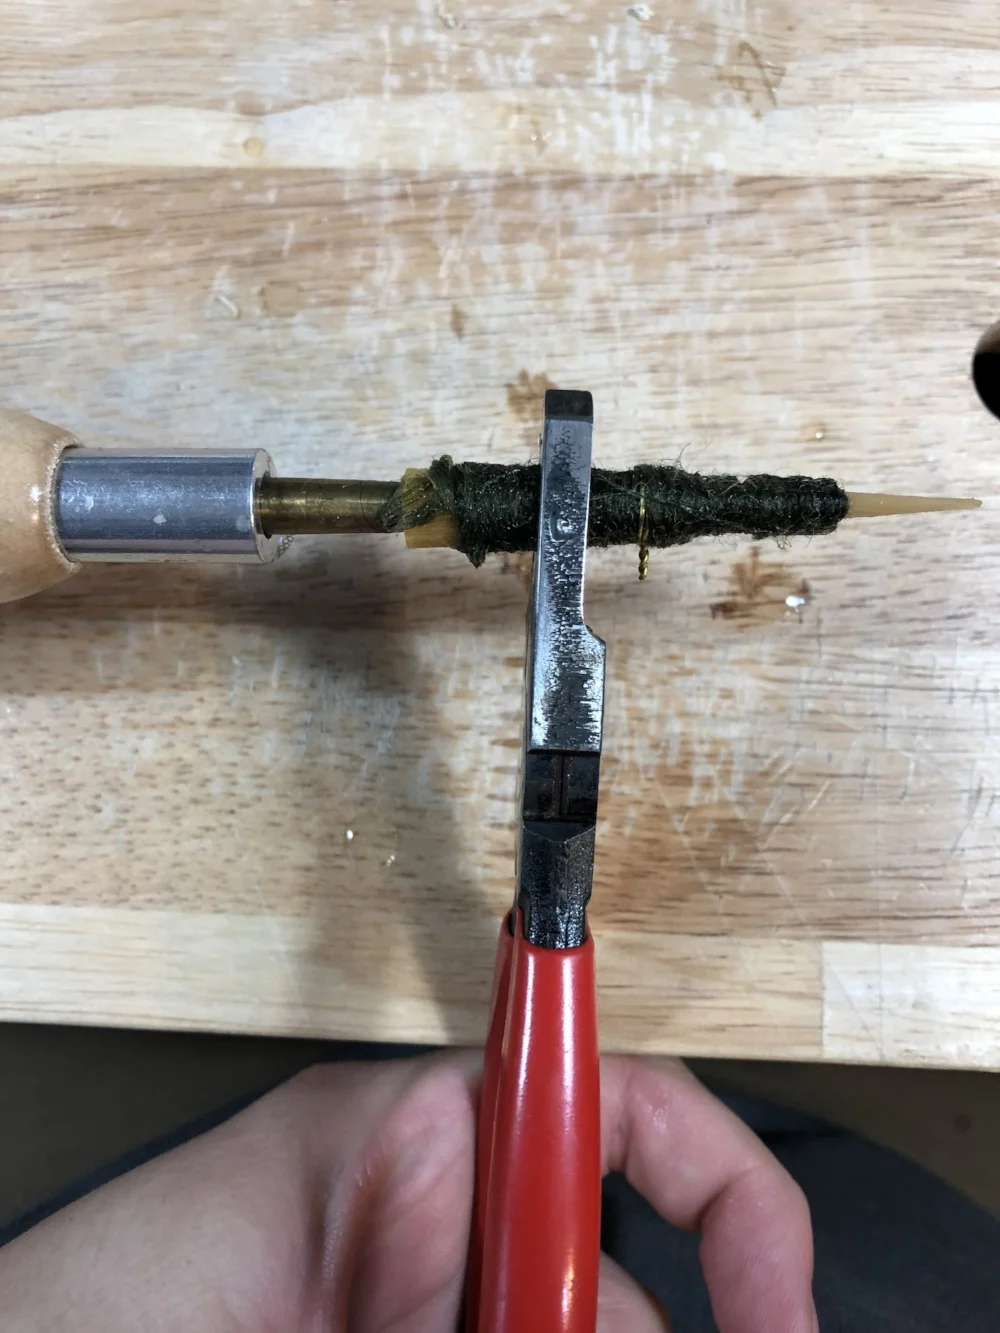
Begin wrapping at least half way up the blade of the reed. Not super tight, but just snug, then once around the wire, be more snug. Continue past the wire in a single layer until around the 3rd wire area in a consistent tension, but not too tight!
Put the mummy back in some water. I prefer warm tap water, but room temperature is just fine.

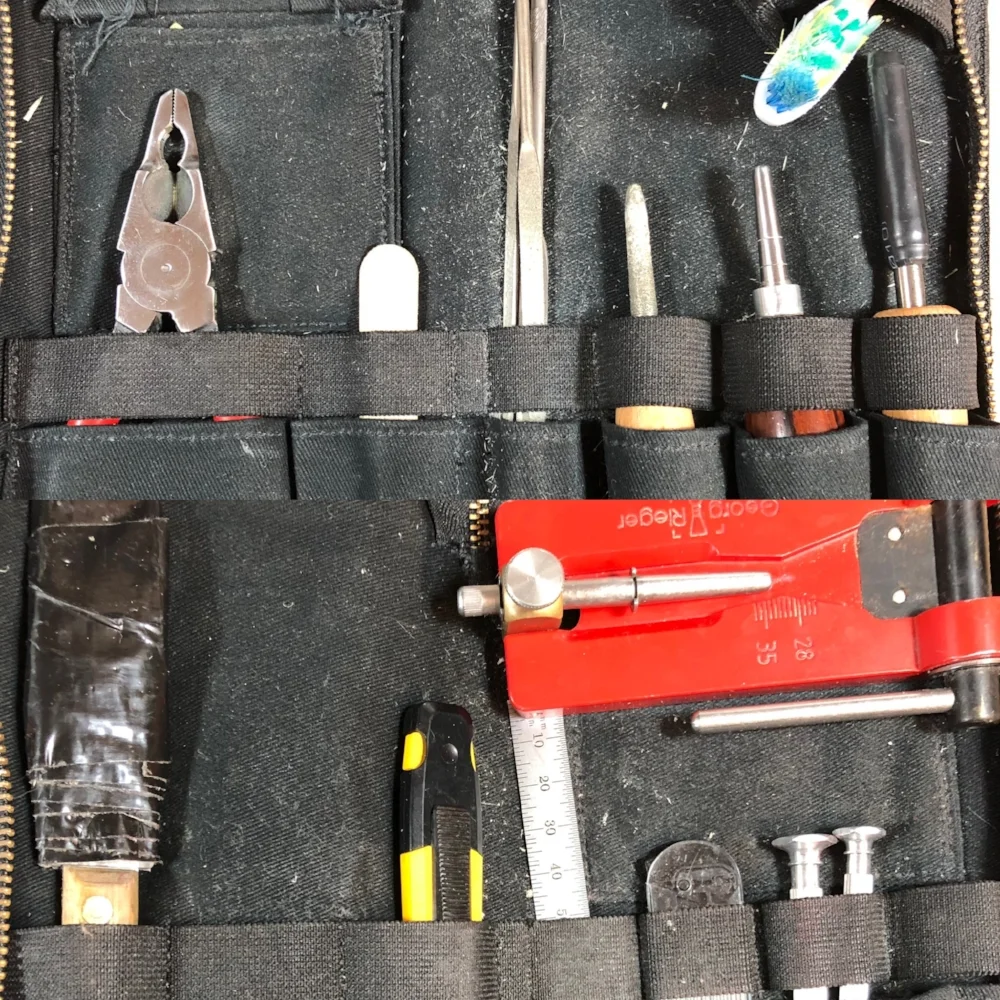
Forming Mandrels
This is a topic of preference, experience, custom, experimentation, pedagogy, etc. Always begin with what is known to you; what your teacher recommends, what suits your bocal, your playing style, etc. So many options, do not be overwhelmed.

Forming the Reed!
Insert the mandrel in the center of the back end of the reed. Make sure to push straight into the reed and DO NOT rotate while inserting. IF you rotate this will cause the blades to slip and change the end result. Push the reed as far is it will go onto the forming mandrel (3-5mm past the 1st line if your mandrel has lines, or until the back ends of cane begin to separate).
Rounding the tube
Once on the mandrel use your pliers to round the reeds’ tube to the mandrel. Make sure not to go above the 2nd wire mark/measure while rounding the tube, but make sure to round the bottom of the reed as much as possible.

Drying formed blanks
Everyone has a preference for drying time. Some people put wires on right away, some people let the blanks dry for weeks, or even months. Experiment, find what works for you and your situation. Personally, I like to let them dry completely for 1-2 weeks before adding wires, then I let them rest again for another week or two before wrapping (if I am able to).

Adding wires
I begin with the 3rd wire and work my way up (unless I am doing the Herzberg Bevel, in which case I take off all wires, bevel, and then begin with 1st wire, 3rd wire, 2nd wire). When putting on the 3rd wire, I put the reed at the top line on the mandrel to start. I then wrap the wire around the reed ABOVE where the wire will end up. I crimp the reed nice and tight around the mandrel, tighten the wire, then wiggle it down into place and re-tighten. This ensures a tight round bottom end of the tube.

Check the Blades
Before adding the 2nd wire, check the blades! If the blades have shifted, and there is an overlap, loosen the first wire and shift the blades back into place. Then crimp the reed from the second wire mark down to the bottom to make sure the tube is realigned properly. Then tighten the first wire slightly.

Add the 2nd wire
Finally, add the second wire. Make sure to round the tube with your pliers to make sure there are no lumps or places for air to catch while playing. The tube needs to be straight from the mandrel, through the throat of the reed to the blades. Look at all angles and see if anything looks odd, and shape it with pliers.

Wire Tension
This plays a HUGE role in the reeds vibrations. if your first wire is too tight you won’t play down low very easily, tuning will be wacky, and it will be resistant. Same goes for the second wire. Experiment with how tight and how loose you can go with your wires. Playing principal vs. second will require different tensions (in some cases, depending on the situation). The wire tensions can also have a lot to do with projection and as I said above, Pitch! So beware!

Wrapping
There are many ways to wrap a reed. The basic Turks head is where everyone should start the journey. I like to put Duco Cement, or nail polish below the second wire to the bottom in a nice thick layer. This will help seal the reed and fill all the cracks. This also helps harden the cane on the lower half of the cane stopping the vibrations from the 2nd wire to the 3rd wire.

Cotton, Nylon-Glue, Wax, etc.
To each their own.
I use pre-waxed cotton thread, as I prefer the strength and longevity of the cotton thread. I also put on a nice thick layer of duco overtop of the turks knot (if I am using thread).
Most of the time I use Hot Glue instead of duco and thread, as it saves times, creates a great seal, produces a great sound, and lasts longer than thread.
When using thread, practice on a pencil, or a dowel. Having even tension makes all the difference in vibrations. Using waxed thread helps hold the thread in place even more so and is quicker for wrapping (also creates a nice seal if using wax instead of glue, which is a great option as well).

Time to Rest!
The cane has gone through a lot of changes over the past few days, or weeks, or even months! The reeds need time to settle into themselves, have some zen time.
This is when getting into a schedule of reed making begins to make more sense (i.e. 5-10 reeds a week, so you always have some on hand). Letting reeds rest has a lot of benefits, besides them settling into themselves, it helps with weather changes, altitude, etc. If you are traveling, take a box of blanks with you so they can experience the changes. In my experience, allowing the reeds to go through different altitudes, temperatures, climates, etc, the better the reeds have been and the longer they have lasted.
Experiment!